How to activate SchuCal license softkey by Codemeter
SchuCal start using softkey license instead of dongle.
Requirements:
1. License activation number: should be a 25 digits letter and number combined code.
2. Connect to internet: The computer need connect to internet, which the license to be activated on.
3. Browser: Chrome, Firefox, or Edge (V.79 or higher).
#1: Single-user activation (SchuCal and SchuCAD):
- Open CodeMeter Depot: Two ways to open CodeMeter Depot.
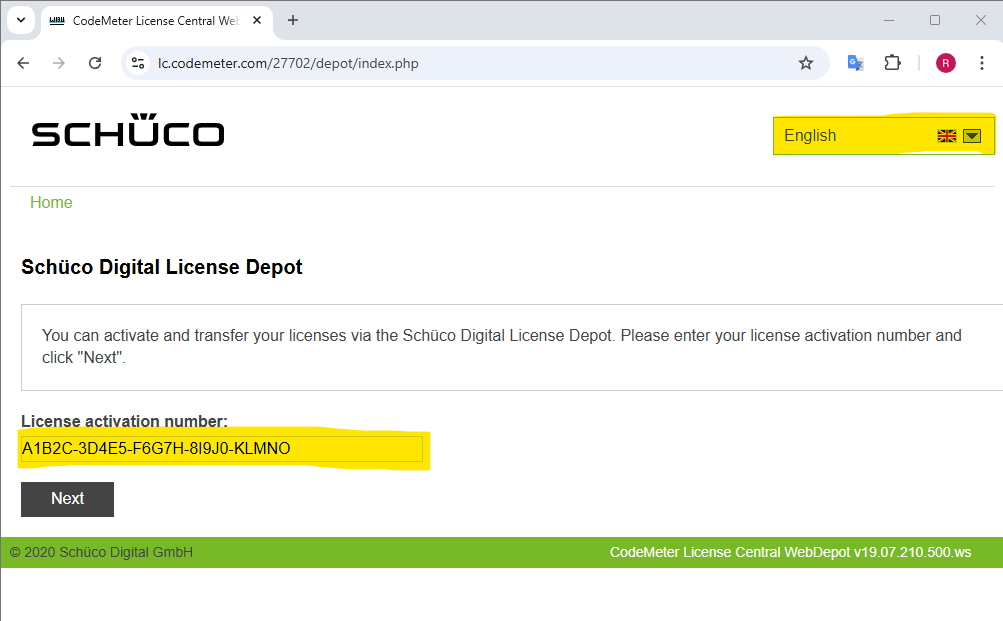
- https://lc.codemeter.com/27702/depot/
- SchuCal Toolbox – License – CodeMeter Activation
- Input the License Activation number.
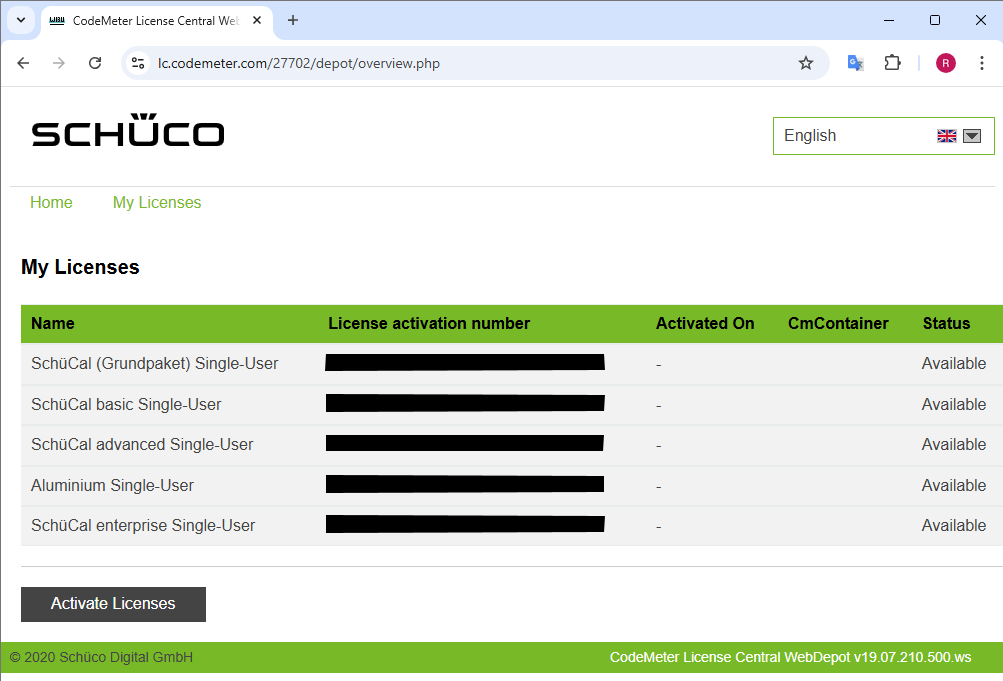
- The available and activatable licenses in the license depot will be displayed. Click Activate Licenses.
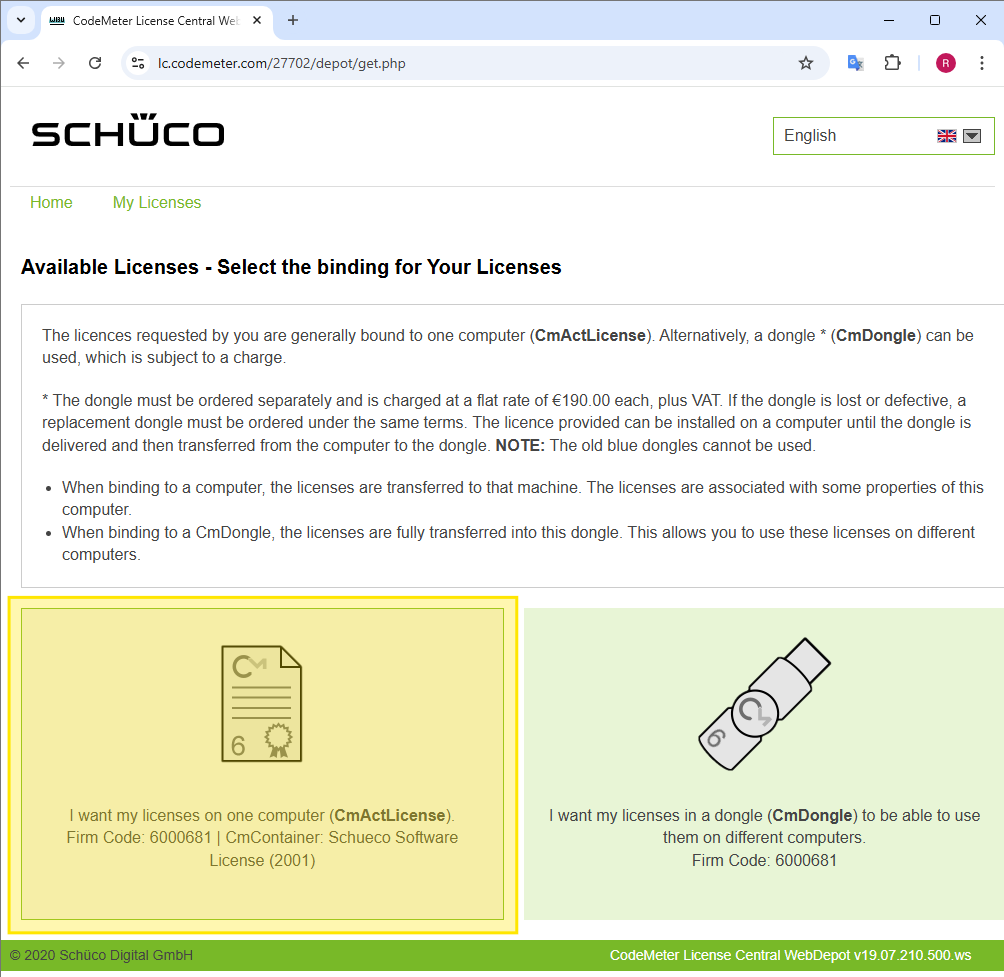
- Select the CMActLicense (Computer-bound license).
- Check all licenses and leave the default setting in place under “Select CmContainer”. Click Activate Selected License Now.

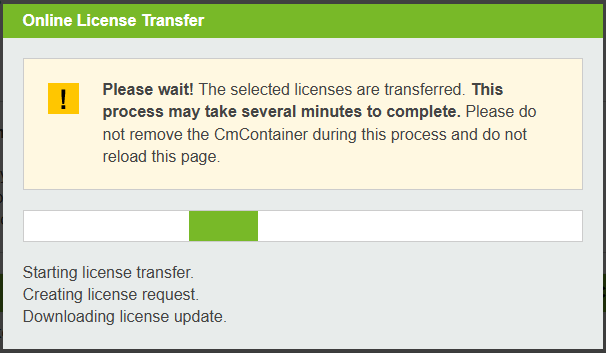
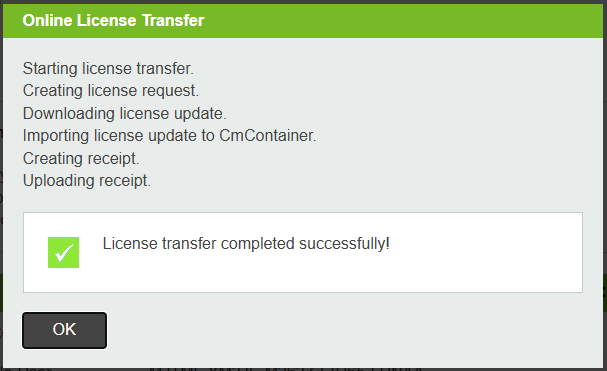
- The selected license will be transferred. Please DO NOT REFRESH or DISCONNECT INTERNET during the transfer. Click OK, when transfer completed successfully.
- You can see the successfully activated licenses information in “My Licenses“.
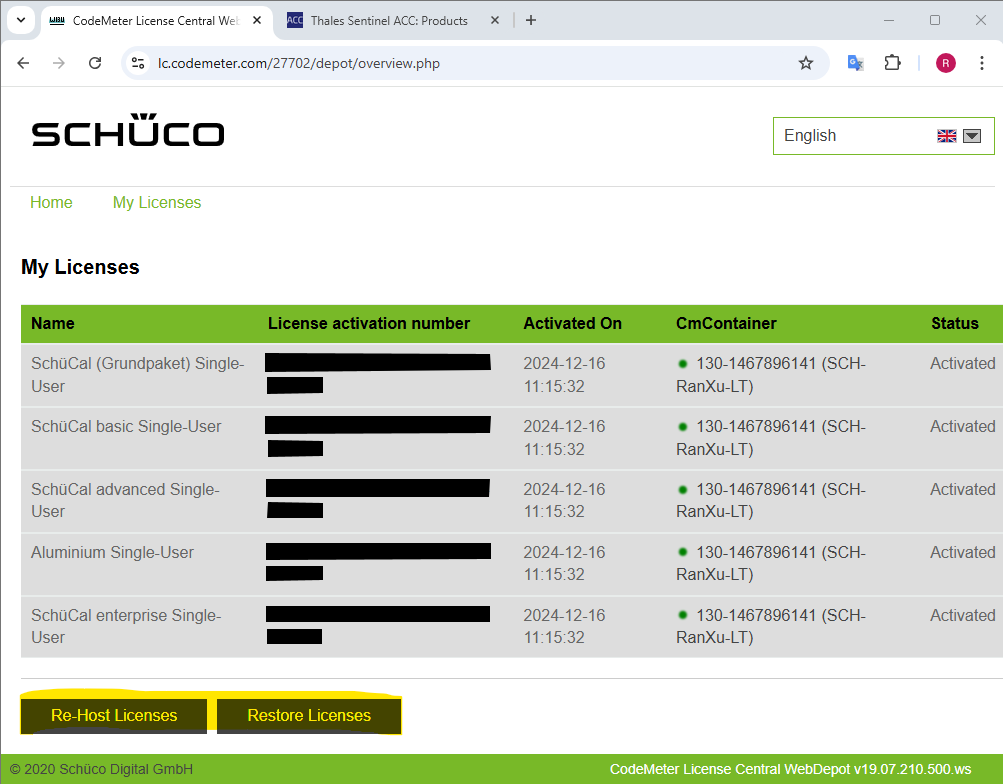
#2: Re-Host Licenses: Multiple times, transfer the license from old computer to new computer, when you are able to operate the old computer.
- On the old computer. Open CodeMeter Depot: Two ways to open CodeMeter Depot.
- https://lc.codemeter.com/27702/depot/
- SchuCal Toolbox – License – CodeMeter Activation
- Input the License Activation number.
- Click “Re-Host Licenses”.
- Select the items you want to deactivate.
- Click “Deactivate Selected Licenses Now” to deactivate.
- On the new computer. Proceed #1: Single-user activation to activate the license.
#3: Restore Licenses: One time only, lock the license on old computer, and activate the license on new computer, when you are unable to operate the old computer.
- On the new computer. Open CodeMeter Depot: Two ways to open CodeMeter Depot.
- https://lc.codemeter.com/27702/depot/
- SchuCal Toolbox – License – CodeMeter Activation
- Input the License Activation number.
- Click “Restore Licenses”.
- Select “I want my license on one computer”.
- Select all items to restore.
- Select the CmContainer.
- Select “I accept the Conditions for license restore”.
- Click “Restore Selected licenses Now” to deactivate.
Multi-user activation (SchuCAL only):
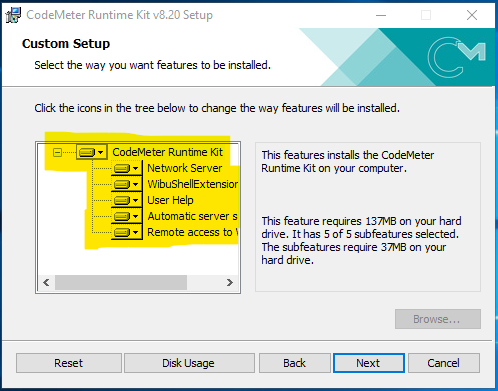
- Install CodeMeter Runtime: Only if SchuCal is not installed on the server.
- The CodeMeter Runtime installation program can be found in the SchuCal disc image file – Extras – Wibu.

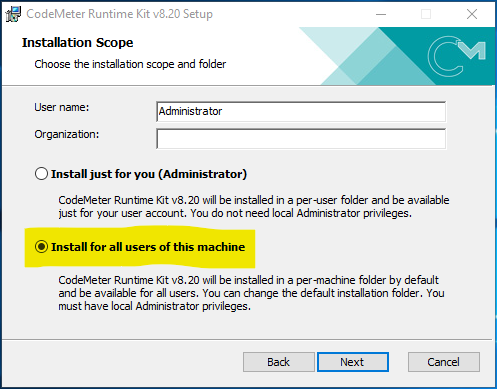
- Please install all features.
- Activate the multi-user license through the CodeMeter Depot. Same steps as Single-user activation.
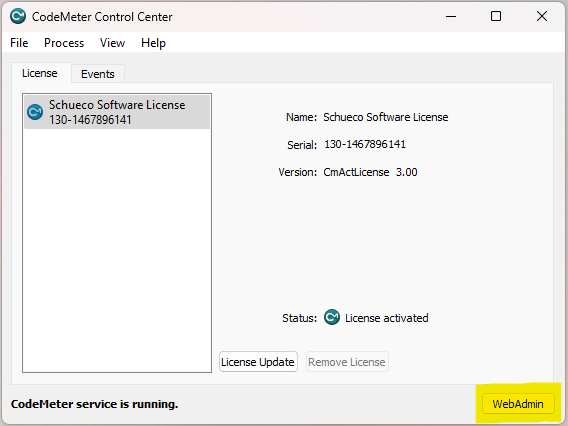
- Share the multi-user license in the network. Open the CodeMeter Control Center – WebAdmin.
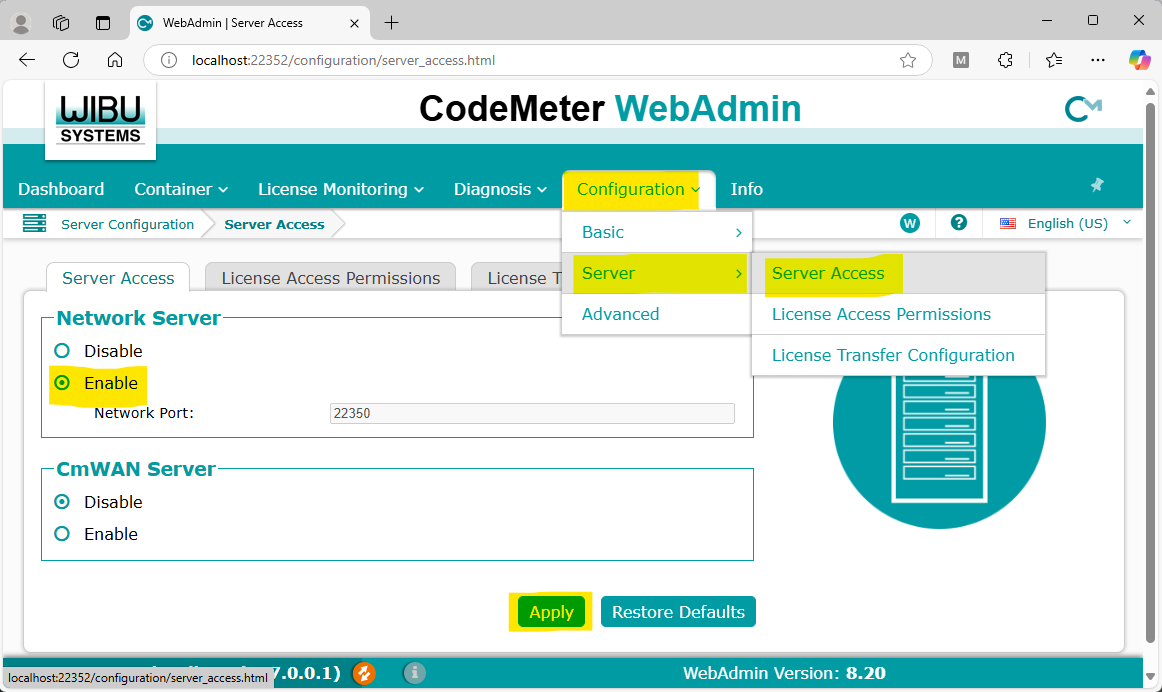
- In the WebAdmin, Configuration – Server – Server Access, Enable the Network Server. Sharing multi-user license is complete.
Re-Host and Restore Multi-user license (SchuCAL only) are same as #2: Re-Host Licenses and #3: Restore Licenses.
Activate Multi-user SchuCAD license:
Activate, re-host, and restore the multi-user SchuCAD license through the CodeMeter Depot. Same steps as Multi-user activation (SchuCAL only).
When SchuCal and SchuCAD have same seats quantity, system will assign the license as first come first serve.
When SchuCal and SchuCAD multi-user license quantity are different, please follow below steps to do the user’s settings through SchuCal. User default setting is to obtain all available licenses as first come first serve. For the user who do not need SchuCAD or MCO functions, need block the permission from the user’s setting.
- Start SchuCal and click user settings button “…“.
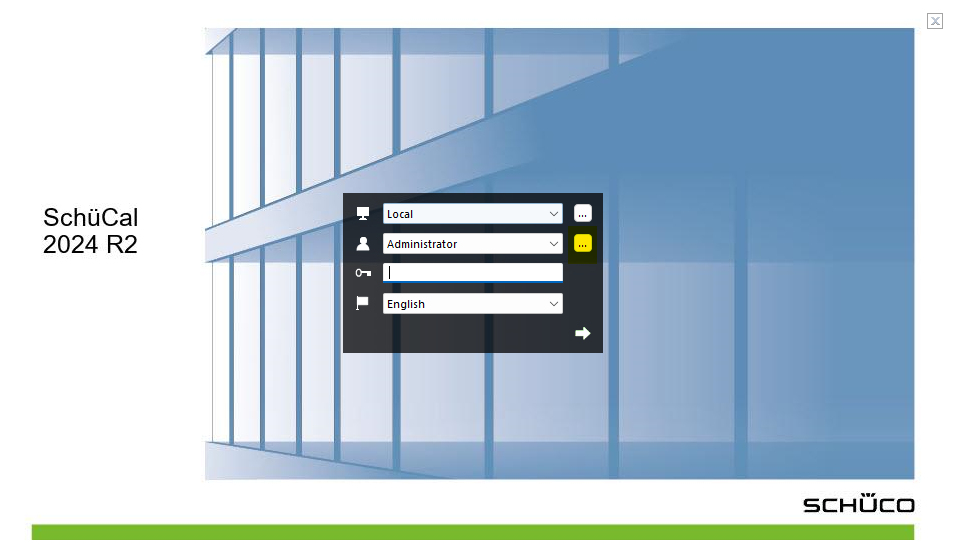
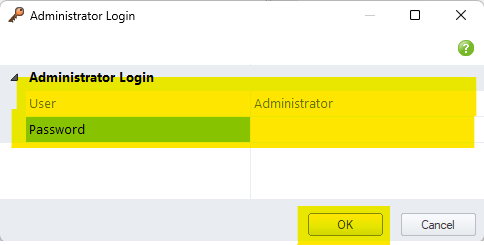
- Click “Administration” to login as Administrator.
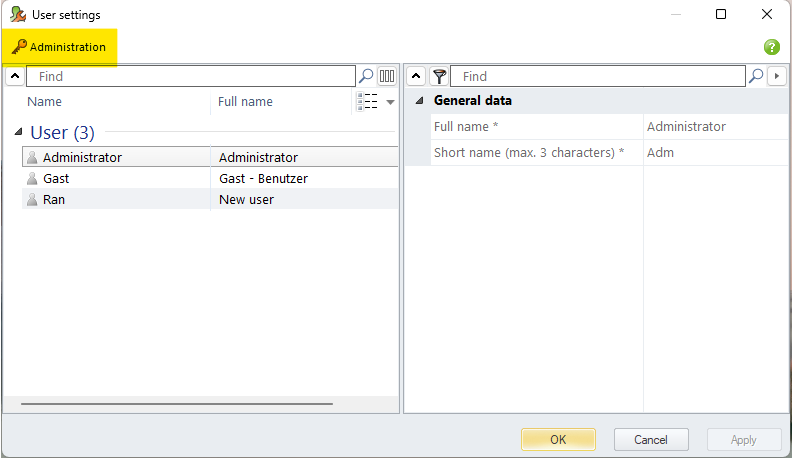
- Select the user need be modified from the “User” list.
- Uncheck “Fabrication Data Center User” from the “General data” section.
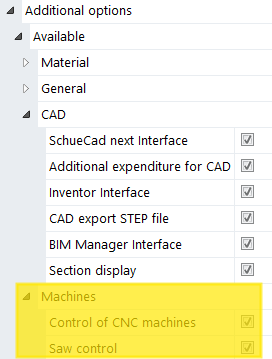
- To block user’s “SchuCAD” function, uncheck all items from “CAD” section, which is under “User rights” – “Additional options” – “Available”.
- To block user’s “MCO” function, uncheck all items from “Machines” section, which is under “User rights” – “Additional options” – “Available”.
- Click “Apply” to save the setting.
- Click “OK” when finished for all users.